Warmup
Introduction
Welcome in the labs part of the CS202 course!
They will consist of a series of seven topics spreads over 8 weeks, one of which will be graded.
Their objectives are:
-
to concretely illustrate several aspects of the lectures;
-
to let you develop a more realistic applications in C (with files, pointers, sockets, threads, external library calls, ...) than in simple exercises;
-
to let you practice usual development tools, among which: control version systems (
git), manpages,make, debugger (gdb); -
to teach you how to use system (or external) libraries;
-
to practice (a bit of) refactoring.
The first of these labs, this week, is a "warm-up" to setup all the needed tools, and make you ready for the next labs (incl. the graded one which will also focus on the tools you learned this week).
Warmup phase
Objectives
In the warmup phase, we will setup and learn several tools that will be useful for the rest of the labs:
- setup GitHub;
- review (learn?) (a bit of) Git;
- compile a project made of several C code files;
- use a debugger.
The aim of this warmup phase is to guarantee that you are ready to start with the labs; that you have the proper working environment to do so. It is really important that this objective is fulfilled before moving to the next labs. Do not hesitate to come to us for help.
Concretely, what we expect you to do is to:
- setup Git and get exercise material;
- compile a C program using an external library (OpenSSL) [1 exercise];
- understand and practice compilation of C software made of several files (and use
make); - practice the debugger.
Environment
For these labs, you have to work on Linux. For this you can either:
- use one of the IC-CO-IN-INJ-2025-Spring* virtual machines (with or without MA suffix), either remotely from your own computer through vdi.epfl.ch, or directly on the Dell terminals provided in rooms CO-020 to CO-023 or INF3;
- install a virtual machine of your own on your own computer (see this page for VMWare or that page for VirtualBox);
- use a Live USB on your own computer;
- use your own computer directly if it's already a Linux box.
No other OS will be supported (nor accepted) for these labs.
In addition to the standard C development framework (editor, compiler, debugger), you'll nee the following tools (sudo apt install <package> if you are on your own Debian/Ubuntu-like computer):
git(this is the package name to be installed);- some SSH client, e.g.
openssh-client; - documentation (manpages) :
manpagesandmanpages-dev; - [optional]
doxygenif you want to automatically produce the documentation out of your source code; - [optional]
graphvizto see the graphs generated by Doxygen; libssl-dev: some cryptographic function we will use to compute "hash"-code of images;libvips-devto process images from C code;libjson-c-devto process JSON content from C code.
GitHub
You certainly already know Git and GitHub (not to be confused!), maybe from some former classes. This is just a quick recap, or a gentle introduction if you don't know them yet.
GitHub is one of the public servers to offer Git services. Each group (pair of two students) will receive a repository when registering on our "GitHub classroom", as explained below.
The first thing to do is to have a GitHub account. If you don't have one yet, create it by registering here. A free account is more than enough for this course.
(if you already have a GitHub account, please use it for this class).
Then, once you have a GitHub account, join the warmup assignment, there: https://classroom.github.com/a/2sV5sB5M.
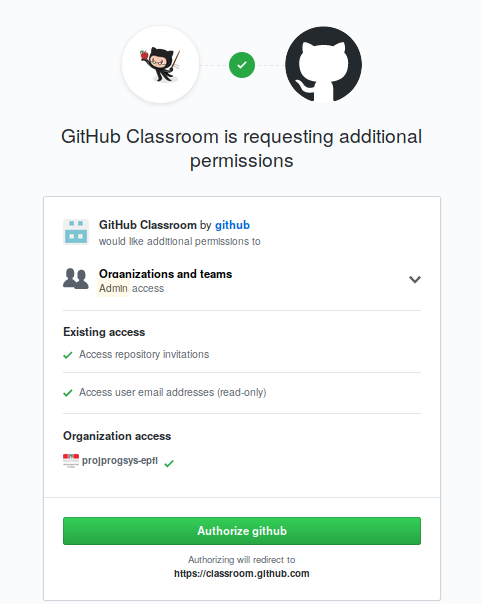
GitHub Classroom may ask you the right to access your repositories:
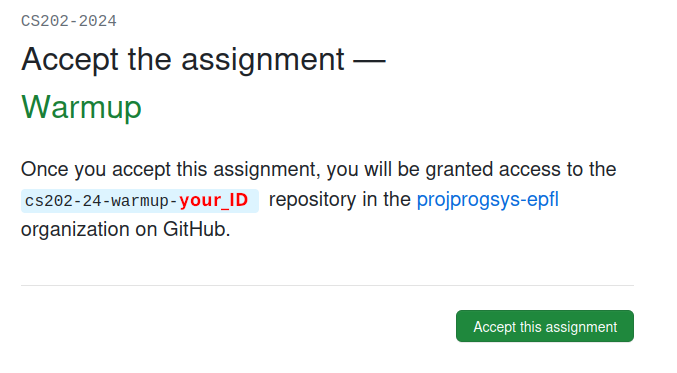
then to join this first assignment (click on YOUR SCIPER NUMBER; please don't use anyone else SCIPER! If you cannot find your SCIPER, click on "Skip to the next step"):

Then the first student of the two in the group has to choose a group name:
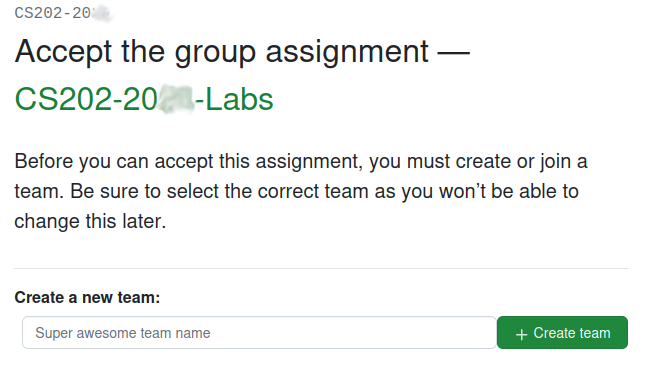
For the second student to register, simply select your group in the team list.
Once the team created/joined, you have to accept the assignment:
Once all this done, you should receive a message from GitHub that you joined the "Labs" assignment and that you have a new repository cs202-2026-labs-YOUR_TEAM_NAME, the URI of which looks like:
git@github.com:projprogsys-epfl/cs202-2026-labs-YOUR_TEAM_NAME.git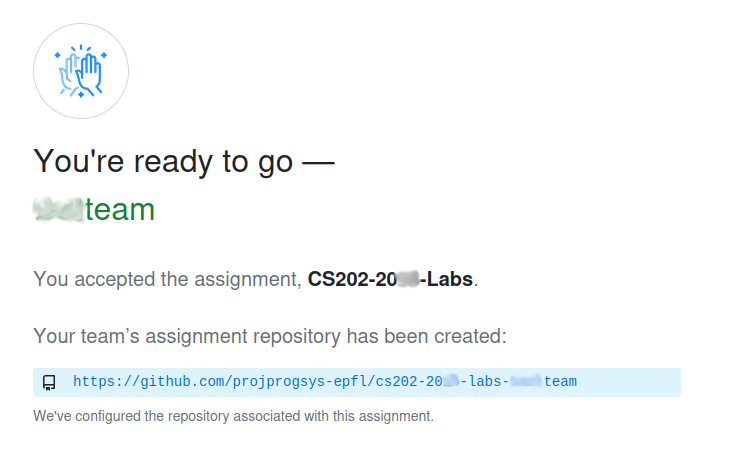
To be able to clone this repository, you have to add your SSH public key (the one of the computer you are using) to GitHub.
If you don't have any SSH key yet (on the computer you are using), you can generate one with:
ssh-keygenCopy then the content of the file ~/.ssh/id_ed25519.pub into GitHub SSH public keys inside "Authentication keys" (click "New SSH Key").
Git
It's not the purpose of this class to teach you Git, nor to present all its details. The purpose of this section is to provided you a short description on the necessary commands:
git clone [REPO_URI]git pullgit add [FILE]git commit -m "Commit message"git pushgit statusgit tag
For each command, you can get help from git by doing:
git help <COMMAND>In case you need a recap on git, either go to your former material (e.g. CS-214 if you took it), or see this complementary recitation page (in English; and there in French).
Ready to go
(If you have received the confirmation email from GitHub) Now go and get the content of this warm-up assignment:
git clone REPO_URIThis will create a local directory on your computer, named like cs202-2026-labs-YOUR_TEAM_NAME (with your GitHub ID at the end).
Go into that directory:
cd cs202-2026-labs-YOUR_TEAM_NAMEYou should find two sub-directories: done and provided. This is how we will proceed for the labs:
-
all what we will provide you (incrementally) will be put in the
providedsub-directories; THIS SUB-DIRECTORY (provided) SHALL NOT BE MODIFIED (by you); -
all your work has to be done in the
donedirectory; (incrementally) copy the necessary files fromprovidedtodoneand then proceed.
manpages
Before moving on, let us recap that the manpages are THE reference documentation in Unix world.
You can read them with the man command (they can also be read on line).
The first manpage to read (maybe not in whole ;-), but at least have a look at it) is the manpage of the man command itself:
man manUse the space bar to move forward, 'b' to go backward and 'q' to quit. Type 'h' to get more help.
man actually uses another command, a "page viewer". In most of the modern Unix systems, this page viewer is less (replacing former more command!). Thus maybe the second manpage to read is the one of less:
man lessOn of the first function you have dealt with in C was printf(). Let's try to see its manpage:
man printfHmm?... This does not seem to be the right printf...
If you have a "PRINTF(1)" on the very top of the page, this is indeed not the expected C printf() function.
There can indeed be several manpages with the same "title". To mark the difference, the manpages are organized in "Sections". Go and read the manpage of man again if you missed that information:
man manTo go to the desired printf manpage, we have to look for the one in "section 3". Try to do it by yourself (maybe read the manpage of man once again).
And don't forget to use man in the future, whenever needed!
Compilation of code with library
The aim of this first exercise is to continue setting up your environment to be able to properly code the labs.
In these labs, we will make use of several libraries (as explained in the introduction). Let's try here to use the first one:
libssl; this library offers cryptographic functionalities (seeman ssl); we will use it to calculate the hash ("SHA code") of some images.
Installation
If you work on your own Linux (not on EPFL VMs), and you didn't install it yet, please install libssl-dev:
sudo apt install libssl-dev libssl-docIn the provided sub-directory you find a file sha.c. First copy it to your done and work there:
cd done
cp ../provided/sha.c .
To compile it, you need to add the ssl can crypto libraries. This is done by adding the -lssl and -lcrypto flags; e.g.:
gcc -std=c99 -o sha sha.c -lssl -lcryptoIf everything is properly installed, the above compilation should succeed and you should have a ./sha program in your done sub-directory. This exec does not much for the moment as its main part is still missing. This is what you have to add now.
SHA codes
A "SHA code", or "SHA" (which stands for "Secure Hash Algorithm"), is a compact representation, almost certainly unique, and hardly invertible (reciprocal), of any data. More concretely:
-
compact: whatever data, whatever their length, will be represented by the same amount of bits; it this lab, we will use 256 bits ("SHA256");
for example, the SHA256 of "hello" (without newline, nor quotes) is
2cf24dba5fb0a30e26e83b2ac5b9e29e1b161e5c1fa7425e73043362938b9824; -
almost certainly unique: different data will most probably have two different SHA; this is not guaranteed (there are "only" 1077 different SHA256), but highly probable: with 1035 different data, the probability to get the same SHA is 10-6; when two different data have the same SHA, this is called a "collision";
-
hardly invertible : from a SHA code, it's extremely difficult (= impossible in practice) to guess its corresponding data; one consequence of that is that a small variation in the data leads to a completely different SHA; for instant, the SHA256 for "hello!" (without newline, nor quotes) is
ce06092fb948d9ffac7d1a376e404b26b7575bcc11ee05a4615fef4fec3a308b
(to be compared to the one of "hello" above) and the one of "hello\n" (i.e. with a newline) is
5891b5b522d5df086d0ff0b110fbd9d21bb4fc7163af34d08286a2e846f6be03.
Complete the provided code
The provided code (sha.c) compiles but does nothing really interesting. Actually there is no computation of the SHA256 of the input; no call to the SHA256() function from the libssl.
Have a look at how to use this function:
man SHA256(if you have the manpages for this library installed on your computer; otherwise, read it online.
Add, where indicated by "TODO", a call to compute the SHA256 of the input string.
Example:
If everything is properly done, you should get:
Type a sentence: Hello world!
The SHA256 code of
"Hello world!
"
is:
0ba904eae8773b70c75333db4de2f3ac45a8ad4ddba1b242f0b3cfc199391dd8
You can also debug with the "hello" string given above (with the newline!).
Compilation of multiple files, Make and Makefiles
Background knowledge
The source code of real-life applications written in C is often distributed over several text files called "source files", which are "glued together" by the compiler to create an executable program from the source code. This way of proceeding is called "modularization" and is detailed
-
in those video lectures:
- Separate compilation;
- (not fundamental) More on header files;
- Makefiles;
- (optional) Linker and loader explained;
the slides of which are on Moodle.
Choose your favorite learning way (maybe benefit from both).
We strongly recommend you go through this material before moving on.
Practice
The objectives of this section is that
- you know the basics of
Makefiles; - you can read a simple
Makefile; - you can update existing simple
Makefiles.
We don't expect you to write your own Makefiles from scratch, neither to master all the arcane details (while reading).
Read, then update, simple Makefiles
Go ahead with the above mentioned tutorial. Follow (and understand) examples 1 and 2, then exercises 1 and 2, and then 3.
Understand bigger projects
The sub-directory bigprj (in provided directory) contains a "big" project for which we propose you to write its Makefile.
IMPORTANT REMARK : the code provided in bigprj is under copyrights and shall not be copied nor reused anywhere else, neither in total nor any piece of it.
(It's furthermore quite bad code and is thus not at all a good example of good practice.)
It's there only for you to learn Makefiles by trying to write one to compile this project.
That code uses sub-directories and one C99 function (roundf()).
To tell the compiler to search for header files in some sub-directories, add an -I option per sub-directory. For example, when compiling machin.c, to tell the compiler to search for a header file in the stuff sub-directory, you would do :
gcc -c -I stuff machin.c -o machin.o(See also the CFLAGS variable in the make tutorial.
To compile to the C99 standard (or higher), pass the -std=c99 (or -std=c17 or -std=c2x) option to the compiler (see the CFLAGS variable).
Finally, to be able to use C99's roundf() function, you need to link to the math library by adding -lm.
(See also the LDLIBS variable in the make tutorial.)
Notes:
-
The provided code compiles with many "warnings". We do not ask you to fix these errors, but simply to write a
Makefilethat produces ahandexecutable. -
You don't need to run it. If you have, you can simply quit it by typing
Ctrl-C.
Debugging
In this last part, we'd like you to practice debugging of C code. This is very important to master debugging before going deeper into the following labs. Otherwise, without a good practice of debugging, you'll really loose lots of times.
And this is also something we will evaluate in the graded lab.
For those who took the CS-214 Software Construction class, also remember/review all the methodologies, good practices, your learned there about debugging. Maybe have a refresh of that material first.
Tools
To help you find faults in code (especially in your own code later on in the labs; think about it!), there are several tools available:
-
compiler options
-
static code analysis
-
dynamic memory analysis;
-
and, of course, debuggers.
Useful compiler options
The compiler is a great help when you know how to use it and interpret its messages.
Its behavior, more or less verbose, can be modified using compiler options, the most useful of which are detailed here.
In the same spirit (using the compiler to find errors), it can also be useful to use different compilers (with the options below) on the same code, as they don't necessarily detect the same things. On VMs, you have gcc and clang.
The first thing to do is to specify the standard used (as there are many non-standard "dialects"). This is done with the -std= option. We recommend -std=c99 or -std=c17. To stick strictly to the specified standard (and reject the associated "GNU dialect") add the -pedantic option.
Then, it can be useful to let the compiler warn us with lots of the usual warning. This is done with the -Wall option (like "all warnings", even if they're actually not all there ;-)`).
For even more warnings, add -Wextra.
And here are a few more that we think are worth adding (you're free not to if you find them too fussy):
-
-Wuninitialized: warns of uninitialized variables; -
-Wfloat-equal: warns of equality tests on floating-point numbers; -
-Wshadow: warns if one name masks another (risk of scope problems); -
-Wbad-function-cast: warns of incorrect function return type conversion; -
-Wcast-qual: warns of pointed type conversion that removes a qualifier (typicallyconst); -
-Wcast-align: warns of pointed type conversions that do not respect memory word alignment; -
-Wwrite-strings: warns of (risk of) confusion betweenconst char *andchar *; -
-Wconversion: warns of implicit type conversion; -
-Wunreachable-code: warns of useless (unreachable) code; -
-Wformat=2: increases the level of format warnings (such asprintfandscan) compared to-Wall; -
-Winit-self: warns of recursive initialization (such asint i = 3 * i;); -
-Wstrict-prototypes: warns of function declarations without arguments; -
-Wmissing-declarations: warns of functions defined but not prototyped; this can be useful for detecting the omission of a prototype in a.h(or the omission of a#include).
Finally, you can of course add other options if you feel they are useful. As usual, check out the "man pages" for more details.
Static code analysis
The static code analyzer is a tool that tries to find errors in code by "imagining" all possible execution paths. The scan-build (and scan-view) analyzer is available on VMs. It is used by simply adding scan-build in front of the build command, e.g. :
scan-build make
scan-build make cecicela
scan-build gcc -o monexo monexo.c
The easiest way is to try :
scan-build gcc stats.c -lmThis command tells you (at the very end) to look at its analysis using scan-view, e.g. :
scan-view /tmp/scan-build-2025-02-17-175346-107146-1(but this file name changes every time).
We'll let you have a look at what it found...
Using a debugger
See this tutorial for instructions on using the gdb debugger.
This tutorial takes as its example the first program you'll have to hand in (stats.c), but we encourage you to try your hand at the other codes too (ex1.c and ex2.c) and to go back and forth between this topic and the tutorial in question (rather than reading it linearly and then continuing with this topic).
Methodology for debugging
To find an error efficiently, we suggest the following general tips (other more job-specific tips are also provided below):
-
try to correct only one bug at a time;
-
always start with the first error;
-
isolate/identify the bug in a reproducible way: always retest with exactly the same values each time;
-
apply the following methodology (it may seem trivial, but all too often we've seen students waste their time looking for bugs in the wrong place because one of the following 2 "dots" was not placed on the right side; often due to over-strong assumptions (wrong guesses) or wrong/too-fast deductions):
-
always have 2 clear places (2 "dots") in your code:
-
one place where you are absolutely sure that the bug has not yet occurred (e.g. the very beginning of the program);
-
and another where you are absolutely sure that the bug has occurred (e.g. the point where the program crashes, or simply the end/beginning of the program);
-
-
move (advance/reassemble) the most promising of these two points, being sure not to "cross over" to the other side of the bug; check this aspect ("not cross over") with certainty;
-
at the end of this process (of dichotomous searching in fact), the two "points" will be exactly on the spot of the bug.
-
-
if you're searching for bugs using display messages (
printf()) :-
always put a
\nat the end of each message; -
mark the beginning of each of your debugging messages with a clear identifier reserved only for this purpose (e.g. "
####"); this allows you :-
to easily see these messages in the program output;
-
find them easily in your code to edit/delete later;
-
-
have a unique part in each message (e.g. "debug(1):", "debug(2):", "debug(3):", etc., or "here i=", "here j=", "here k=", etc.; you can of course combine);
having this discipline with debugging messages may seem like a waste of time (especially when you're looking for the bug), but, believe me, it actually saves a lot of time in the end!
-
Debugger training exercises
Here are two exercises to help you get to grips with gdb.
Exercise 1
Look at the ex1.c code to get an initial idea.
Then compile it for the debugger (either by hand or by making a small Makefile).
Run it in the terminal to see what it produces.
Then use the debugger to determine the values of d0, d1 and d17 :
-
set one or more well-placed breakpoints
-
try the commands :
-
stepandnext; -
continue(abbreviatedcont), followed, or not, by a number; -
printand/ordisplay.
-
You can also try advance and finish.
NOTES:
-
you can see the syntax and explanation of a command in
gdbby usinghelpfollowed by the command; e.g. :help adv -
you can list all your breakpoints via :
info break
Exercise 2:
Take a look at the ex2.c code to get an initial idea. The aim of this code is to calculate the entropy of a given distribution by its frequencies (= integer counts).
Some examples (useful for debugging):
-
the entropy without any count is 0, no matter how you enter it:
0
0 0 0
0 0 0 0 0 0
etc; -
the entropy of any 1-value distribution is 0, however you enter it:
0
0 1 0
0 12 0
0 0 12
0 0 0 33 0 0 0
etc; -
the entropy of any distribution with 2 equiprobable values is 1 bit, regardless of how it is entered:
1 1
0 1 1 0
0 12 0 12
etc; -
the entropy of any distribution with 3 equiprobable values is 1.58496 bit, however you enter it;
-
the entropy of the distribution :
1 2 3 4 5
is 2.14926 bit.
The code provided contains several errors. Try to find them using the debugger: breakpoints, next, cont, display, etc.
You can even start by running the code directly in gdb, typing run.
then enter :
1 0and see what happens.
To locate the error in the call stack, do :
whereTo see the code :
layout srcTo navigate the call stack :
up
down
Give it a try...
Note: there are four things to be corrected.
Exercise 3: a simple case on your own
All the above tools (compiler options, static code analysis, dynamic memory analysis (when you have pointers) and debugger) will help you to be more efficient in your coding. We therefore ask you to start using them to correct the stats.c code provided.
Try to fix entirely the stats.c file provided, whose purpose is to calculate the mean and standard deviation (unbiased) of the age of a set of 1 to 1024 people (beware! it contains several errors, of different kinds; there are, however, no errors of a mathematical nature: the formulas are mathematically correct; but note however that the standard deviation of a population reduced to a single individual must be zero).
The first thing to do might be to complete your Makefile so that it can produce stats with information useful to the debugger (option -g). You could also take the opportunity to turn on the compiler's warnings and look in detail at what it's telling you and, above all, understand why it's telling you.
Once the program has compiled, if possible without warning, here are 3 ways to go further in correcting the program:
-
test values that are outside the expected limits, and see if the program reacts as you'd expect. For example: what happens if you enter a negative number of people? a negative age?
-
calculate by hand the mean and standard deviation (following the provided formula!) of a small sample and compare them with the output of your program. If there are differences, use the debugger to find out where they come from;
-
remember to test all the limiting cases of these formulas.
[optional] Documentation with Doxygen
When editing the sha.c file, you may have noticed that it is commented (always comment your programs!), in a rather peculiar format ("what's with the @?").
It's not just for show; it's also useful!
Type :
doxygen -g
doxygen Doxyfile
then view the file html/index.html in your favorite browser.
Click on "Files", then on "sha.c".
Cool, isn't it?
Clean it up with the command
rm -r latex htmlIn future, remember to document your code with Doxygen-compatible comments.
Examples will be provided, but if you want to know more, have a look at the Doxygen website.